
Coleman Power Steel Pool 16×10 Manual: Article Plan
This article details the setup, maintenance, and safety of the Coleman Power Steel 16×10 pool, referencing official manuals and ASTM standards for optimal use.
It covers everything from unboxing and assembly to winterizing, ensuring a safe and enjoyable swimming experience throughout the seasons.
The Coleman Power Steel 16×10 pool offers an affordable and convenient above-ground swimming solution, popular for its robust construction and ease of assembly. This guide provides a comprehensive walkthrough, drawing from official Coleman manuals and related resources like Manualzz and Bestway’s YouTube channel.
Understanding the components and following the correct installation procedures are crucial for safety and longevity. This pool, part of the Steel Pro and POWER STEEL series (models 90489E and similar), requires careful site preparation and adherence to safety regulations, including ASTM F1346-91 for pool covers and alarm systems.
Proper water chemistry management and regular maintenance are essential, alongside understanding the pump and filter system (refer to its specific manual). This article aims to empower owners with the knowledge to enjoy their Coleman Power Steel pool safely and efficiently.
Unboxing and Inventory
Upon receiving your Coleman Power Steel 16×10 pool, carefully inspect the packaging for any damage during transit. Do not return the item to the store; instead, meticulously unpack all components and cross-reference them with the parts list included in the manual.
The package should contain the pool frame, liner, pump, filter, safety cover, and various connectors and fittings. Model numbers like 90458E, 90479E, 90489E, 90490E, 90491E, 90495E, and 90499E share similar component sets, but verify all parts are present.
Document any missing or damaged parts immediately. A thorough inventory at this stage prevents delays during assembly. Familiarize yourself with each component before proceeding, referencing the manual’s diagrams for identification.
Checking Package Contents
Begin by carefully opening the Coleman Power Steel 16×10 pool packaging and laying out all components. The primary items to verify include the metal frame sections (base and uprights), the pool liner, and the pump/filter system.
Confirm the presence of essential accessories like the safety cover (ASTM F1346-91 compliant) and any included connectors, hoses, or valves. Check for smaller parts like the drain plug and skimmer basket.
Compare the physical contents against the detailed parts list in the instruction manual. Note any discrepancies immediately. Ensure all manuals for the pump and filter are present, as they contain crucial operational information.
Do not discard the packaging until you’ve confirmed all parts are accounted for.
Identifying Pool Components
The Coleman Power Steel 16×10 pool consists of several key components. The metal frame, typically steel, provides structural support and is comprised of base rails and vertical uprights. The liner, a heavy-duty PVC material, forms the water-holding basin.
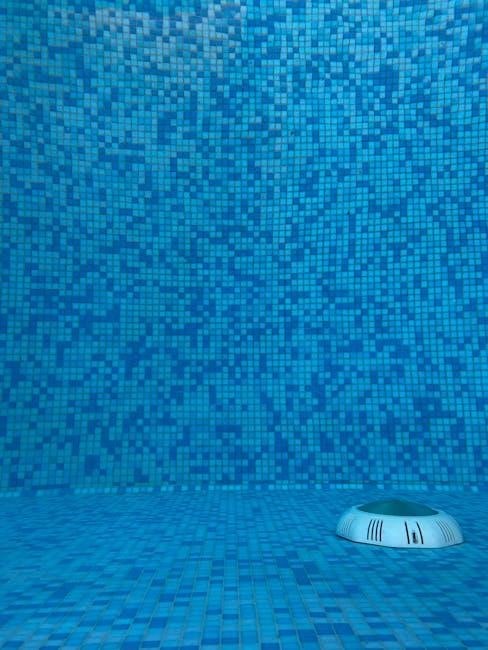
The pump and filter system, often a cartridge filter, is crucial for water circulation and cleanliness. Familiarize yourself with the skimmer, responsible for surface debris removal, and the drain plug for water emptying.
The safety cover, designed for ASTM F1346-91 compliance, prevents accidental entry. Identify all connectors, hoses, and valves needed for assembly. Refer to the manual’s diagrams for visual identification of each part, ensuring correct usage during setup.
Understanding each component is vital for proper installation and maintenance.
Site Preparation
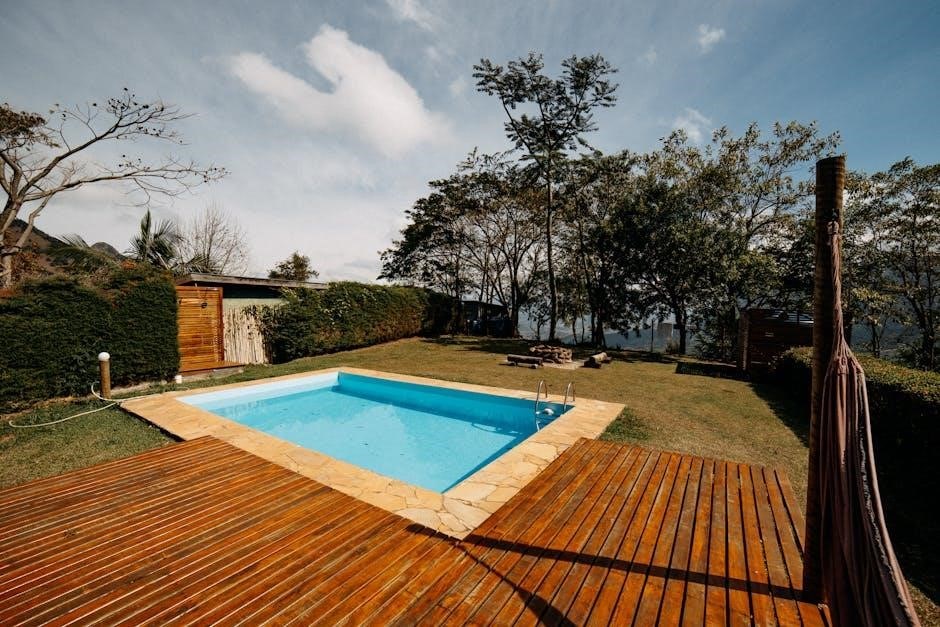
Proper site preparation is paramount for a successful Coleman Power Steel 16×10 pool installation. Begin by choosing a suitable location – a flat, level surface away from overhead power lines and underground utilities is essential. Ensure ample space around the pool for access and maintenance.
Ground leveling requirements are critical. Remove all rocks, roots, and debris. The ground must be firm and capable of supporting the pool’s weight when filled with water.
Consider using a leveling sand base to create a perfectly even surface. A slight cushioning layer can also protect the liner. Avoid slopes or unstable ground, as these can compromise the pool’s structural integrity and lead to potential issues.
Thorough preparation prevents future problems.
Choosing a Suitable Location
Selecting the right location is the first step in a successful Coleman Power Steel 16×10 pool setup. Prioritize a spot receiving ample sunlight for warmer water, but consider partial shade to reduce algae growth. Avoid areas directly under trees to minimize debris accumulation and potential damage from falling branches.
Ensure the location is at least 10 feet away from any structures, fences, or obstructions. This provides sufficient space for maintenance and safe access. Check for underground utilities – call before you dig! – and overhead power lines.
A level surface is crucial, but also consider visibility from the house for safety monitoring. The chosen area should be easily accessible for water filling and drainage.
Careful location selection ensures long-term enjoyment.
Ground Leveling Requirements
Achieving a perfectly level base is paramount for your Coleman Power Steel 16×10 pool’s structural integrity and longevity. Even a slight slope can cause uneven water distribution, stressing the frame and liner. A maximum deviation of 1 inch across the entire pool diameter is recommended.
Utilize a long level and straight edge to identify high and low spots. Excavate high areas and fill low areas with sand, carefully compacting each layer to prevent settling. Avoid using soil, as it can retain moisture and become unstable.
Regularly check the level throughout the process. A properly leveled base prevents potential warping, leaks, and ensures a safe and enjoyable swimming experience. Thorough preparation is key!
Don’t skip this crucial step.
Pool Frame Assembly
Carefully unpack all frame components and verify against the parts list. Begin by assembling the base frame, connecting the steel rails using the provided connectors. Ensure each connection is secure and properly aligned, forming a stable rectangular foundation. Double-check all connections before proceeding.
Next, attach the uprights to the base frame corners, utilizing the designated pins and securing them firmly. These uprights provide vertical support for the pool walls. Ensure the uprights are oriented correctly, with the pre-drilled holes facing inwards.
Proceed with attaching the top rail to the uprights, completing the frame structure. Regularly inspect connections for tightness throughout the assembly process.
Assembling the Base Frame
Begin by laying out the steel rails on a protected, level surface. These rails form the foundation of your pool, so accuracy is crucial. Connect the rails using the provided connectors, ensuring a snug fit at each joint. Pay close attention to the rail orientation; some may have specific markings.
As you connect the rails, form a precise rectangle, verifying squareness using a measuring tape – equal diagonals confirm a square frame. Secure each connector with the included pins, ensuring they are fully inserted. Do not force connections; gentle pressure is sufficient.
Regularly check the frame’s stability as you build. A solid base frame is essential for the pool’s structural integrity. Once assembled, inspect all connections one final time before moving on.
Attaching the Uprights
With the base frame assembled, carefully attach the uprights to each corner and along the sides, utilizing the designated connection points. Ensure each upright is securely fastened with the provided bolts and screws, tightening them firmly but avoiding over-tightening which could damage the frame.
Verify that all uprights are oriented correctly, typically with the pre-drilled holes facing inwards for liner attachment. Maintain consistent spacing between uprights to ensure even liner support. Double-check each connection for stability before proceeding.
The uprights provide essential structural support, so meticulous attachment is vital. A wobbly upright can compromise the entire pool’s integrity. Once all uprights are in place, inspect the entire frame for overall stability.
Liner Installation
Carefully unpack the pool liner, inspecting it for any punctures or damage before beginning installation. Spread the liner out in a clean, dry area, ideally near the pool location, allowing it to warm up and become more pliable. Avoid dragging it across rough surfaces that could cause tears.

Center the liner within the assembled pool frame, ensuring an equal overhang on all sides. Gently smooth out any wrinkles, working from the center outwards. Begin attaching the liner to the uprights using the provided clips or fasteners, securing it evenly around the perimeter.
Take your time during this process; a properly installed liner is crucial for preventing leaks and maintaining water clarity. Avoid stretching the liner excessively, as this can lead to premature wear and tear.
Preparing the Liner for Installation
Before installation, fully unpack the liner and lay it out in direct sunlight for at least one hour. This warming process significantly increases its flexibility, making it easier to maneuver and reducing the risk of tearing during installation. Inspect the entire liner surface meticulously for any factory defects or punctures.
Clear the pool area of any sharp objects – stones, twigs, or debris – that could potentially damage the liner. A smooth, clean surface is essential. Gently shake off any dust or dirt accumulated during shipping. Avoid using harsh chemicals or abrasive cleaners on the liner.
Familiarize yourself with the liner’s orientation; some liners have a designated “top” or “bottom” side. Proper orientation ensures correct fitting and prevents stress on seams.
Securing the Liner to the Frame
Carefully drape the warmed liner over the assembled pool frame, ensuring it’s centered and evenly distributed. Begin securing the liner to the top rail using the provided clips or fasteners, working your way around the entire circumference of the pool. Avoid stretching the liner excessively during this process, as this can lead to premature wear and tear.
Gradually attach the liner, smoothing out any wrinkles or folds as you go. Small wrinkles are normal, but large, concentrated folds should be addressed by gently adjusting the liner’s position. Ensure the liner is fully seated within the frame’s retaining groove.
Double-check all fasteners to confirm a secure attachment, preventing slippage during water filling.
Water Filling and Initial Setup
Begin filling the pool with water, using a garden hose with a spray nozzle set to a gentle flow. As the water level rises, continue to smooth out any remaining wrinkles in the liner from the outside of the pool. Avoid filling the pool too quickly, as this can exacerbate liner wrinkles and potentially damage the frame.
Monitor the frame’s stability as the water level increases, ensuring it remains level and properly supported. Once the pool is approximately halfway full, test the water chemistry and adjust as needed to achieve balanced levels. Initial balancing is crucial for water clarity and longevity.
Continue filling to the recommended level, typically a few inches below the top rail.
Filling the Pool with Water
Start the filling process slowly, utilizing a standard garden hose equipped with a spray nozzle set to a gentle stream. This prevents excessive stress on the liner and frame during the initial stages. Regularly check for and smooth out any wrinkles forming in the liner as the water level rises, working from the outside of the pool.
Monitor the pool frame’s stability throughout the filling process, ensuring it remains level and that all connections are secure. Avoid rapid filling, as this can lead to liner damage or frame instability. Fill to approximately halfway, then pause to assess and adjust the liner if needed.
Continue filling to a level a few inches below the top rail, allowing for displacement when entering the pool.
Initial Water Chemistry Balancing
After filling, immediately test the water’s chemistry using a reliable test kit or strips. Initial balancing is crucial for water clarity, swimmer comfort, and equipment longevity. Focus on pH, alkalinity, and sanitizer levels – typically chlorine or bromine.
Adjust alkalinity first, aiming for a range of 80-120 ppm; Then, adjust pH to between 7.2 and 7.8. Shock the pool with a non-chlorine shock to oxidize any contaminants introduced during the filling process. Allow the filter to run continuously for at least 24 hours after shocking.
Introduce sanitizer according to the manufacturer’s instructions, maintaining appropriate levels for consistent water quality. Regular testing and adjustment are essential for a healthy pool environment.
Pump and Filter System Installation
Carefully unpack the pump and filter system, verifying all components are present. Position the filter near the pool on a level surface, ensuring easy access for maintenance. Connect the hoses, matching inlet and outlet ports – typically marked clearly. Use Teflon tape on threaded connections to prevent leaks.
Plug the pump into a dedicated, 3-wire grounding-type outlet. Never use extension cords. Prime the pump according to the pump manual – this removes air from the system. Once primed, turn on the pump and check for leaks.
Refer to the pump’s specific manual for detailed operation and maintenance instructions. Proper installation and operation are vital for efficient filtration and water clarity.
Connecting the Pump and Filter
Begin by attaching the filter hoses to the designated fittings on the pool wall. Ensure a secure, watertight connection. Next, connect the intake hose from the pool skimmer (or main drain) to the pump’s intake port. Then, connect the pump’s outlet port to the filter’s inlet using the appropriate hose.
Always use Teflon tape on all threaded connections to prevent leaks. Double-check hose clamps are tightened securely. Verify the hose routing avoids kinks or sharp bends, which can restrict water flow. Before powering on, ensure all valves are in the correct position for filtration.
Proper connection is crucial for efficient water circulation and filtration.
Pump Operation and Maintenance (Refer to Pump Manual)
Always consult the specific pump manual for detailed operating instructions and maintenance schedules. Typically, operation involves plugging the pump into a dedicated, 3-wire grounded outlet. Initial operation should include priming the pump, following the manufacturer’s guidelines to remove air from the system.
Regular maintenance is vital. This includes cleaning the pump basket frequently to maintain optimal flow. Backwashing the filter, as per the filter manual, is essential for removing trapped debris. Inspect hoses and connections for leaks or damage regularly.
Never run the pump dry, as this can cause damage. Winterizing procedures, detailed in the pump manual, are crucial for preventing freeze damage.
Safety Features and Regulations
Prioritizing safety is paramount with the Coleman Power Steel Pool. A compliant power safety cover (ASTM F1346-91) is essential, preventing accidental access when the pool is not in use. Pool alarms are highly recommended, and must feature manual deactivation.
Deactivation should be limited to 15 seconds, allowing for entry and exit without disabling the alarm for extended periods. The deactivation controls must be positioned at least 54 inches above the pool threshold, preventing easy reach by children.
Strict adherence to local pool safety regulations is mandatory. Never leave children unsupervised near the pool, and ensure all users are aware of pool rules.
Pool Safety Cover Installation & Compliance (ASTM F1346-91)
The Coleman Power Steel Pool requires a safety cover meeting ASTM F1346-91 standards. This ensures the cover can withstand a specified load, preventing accidental submersion. Proper installation is crucial; carefully follow the manufacturer’s instructions for secure placement.
Ensure the cover completely encloses the pool, with no gaps allowing access. Regularly inspect the cover for damage, such as tears or weakened straps, and replace it if necessary. The cover should be securely fastened, utilizing all provided straps and anchors.
Compliance with ASTM standards is not just recommended, it’s vital for safety. A properly installed and maintained safety cover significantly reduces the risk of drowning.
Alarm System Deactivation Procedures (15-second limit, 54-inch height)
If your Coleman Power Steel Pool is equipped with a safety alarm, understanding deactivation procedures is critical. The alarm must have manual deactivation means, like touchpads or switches, for temporary access. This deactivation period is strictly limited to 15 seconds, ensuring prompt re-activation.
Crucially, these deactivation controls must be positioned at least 54 inches (4.5 feet) above the pool threshold. This height prevents easy reach by young children. Familiarize yourself with the alarm’s specific operation, as detailed in its accompanying manual.
Never permanently disable the alarm; it’s a vital safety feature. Regularly test the alarm’s functionality to confirm it’s working correctly.
Pool Maintenance
Consistent pool maintenance is essential for a safe and enjoyable swimming experience with your Coleman Power Steel 16×10 pool. Regular cleaning procedures include skimming the surface daily to remove debris like leaves and insects. Vacuuming the pool floor weekly prevents algae buildup and keeps the water clear.
Water chemistry monitoring is paramount. Test the water at least twice weekly for pH, alkalinity, and sanitizer levels. Adjust these levels as needed, following the instructions on your testing kit and sanitizer products. Regularly backwash the filter, as per the pump manual, to maintain optimal filtration.
Proper maintenance extends the life of your pool and ensures a healthy swimming environment.
Regular Cleaning Procedures
Maintaining a clean Coleman Power Steel 16×10 pool involves several key procedures. Daily skimming removes surface debris – leaves, insects, and pollen – preventing them from sinking and decaying. Weekly vacuuming is crucial; a pool vacuum effectively removes dirt and sediment from the pool floor, preventing algae growth.
Brush the pool walls and floor weekly to dislodge any clinging algae or dirt. Empty the skimmer basket frequently to ensure efficient water flow. Inspect and clean the filter cartridge or sand according to the pump and filter system manual’s instructions.
These consistent cleaning habits contribute to crystal-clear water and a healthier swimming environment.
Water Chemistry Monitoring and Adjustment
Regularly testing your Coleman Power Steel 16×10 pool water is vital for swimmer safety and equipment longevity. Test at least twice weekly using a reliable test kit for pH, alkalinity, and chlorine levels. Ideal pH should be between 7.2 and 7.8, alkalinity between 80-120 ppm, and free chlorine between 1-3 ppm.
Adjust pH using pH increaser or decreaser, following product instructions carefully. Alkalinity is adjusted before pH for stability. Maintain chlorine levels with chlorine tablets or liquid chlorine, ensuring proper circulation. Shock the pool weekly or after heavy use to oxidize contaminants.
Consistent monitoring and adjustment prevent algae growth, corrosion, and irritation.
Winterizing the Pool
Proper winterization protects your Coleman Power Steel 16×10 pool from freezing damage. Begin by draining the pool below the skimmer, using a submersible pump if necessary. Clean the pool thoroughly, removing all debris. Disconnect and store the pump, filter, and heater, draining all water from these components to prevent cracking.
Use a winterizing chemical kit to balance the water chemistry and prevent algae growth during the off-season. Install a winterizing plug in the skimmer and return jets. Cover the pool with a winter cover, securing it tightly to withstand weather conditions. Protect the pool frame from snow and ice accumulation.
Regularly check the cover throughout winter.
Draining and Cleaning the Pool
Before winterizing, completely drain your Coleman Power Steel 16×10 pool. A submersible pump significantly speeds up this process, removing water efficiently. Lower the water level below the skimmer opening to protect it from freezing. Once drained, thoroughly clean the pool’s interior, removing leaves, dirt, and any accumulated debris with a pool brush and vacuum.
Pay close attention to the bottom and walls, scrubbing to eliminate algae and stains. Rinse the pool surface to remove any remaining cleaning residue. Inspect the liner for any tears or damage, noting these for repair in the spring. Ensure all debris is removed before proceeding with further winterization steps.
Protecting the Pool Frame During Winter
Disassemble the pump, filter, and heater (if applicable) and store them indoors in a dry location. Remove the pool ladder and store it safely to prevent damage or theft. Carefully disconnect all plumbing and drain any remaining water to avoid freezing and cracking. Consider a winter cover specifically designed for your pool size, ensuring a secure fit.
Support the cover with air pillows to prevent water accumulation and potential collapse. Inspect the pool frame regularly throughout the winter, removing any snow or debris that may accumulate. This prevents undue stress on the structure and maintains its integrity for the next swimming season.
Troubleshooting Common Issues
Cloudy water often stems from improper water chemistry; test and adjust pH, alkalinity, and sanitizer levels. A malfunctioning pump may indicate a clogged filter – clean or replace the filter cartridge as needed. Leaks can occur at connections; tighten clamps or replace worn O-rings. If the pool liner wrinkles, attempt to smooth it out by carefully lifting and repositioning it.
Algae blooms require shock treatment and algaecide, alongside diligent filtration. Low water levels can strain the pump; maintain appropriate levels. Refer to the pump manual for specific troubleshooting steps related to its operation. Always prioritize safety and disconnect power before inspecting electrical components.
Electrical Safety Precautions (3-wire grounding-type outlet)
Always connect the pool pump and filter system to a dedicated 3-wire grounding-type outlet. Never use extension cords, as they pose a significant electrical hazard. Ensure the outlet is GFCI (Ground Fault Circuit Interrupter) protected to prevent electric shock. Regularly inspect the power cord for damage, and replace it immediately if any issues are found.
Do not operate the pump if the cord is frayed or damaged. Keep electrical components away from the pool water to avoid accidental contact. Disconnect power before performing any maintenance on the pump or filter. Adherence to these precautions is crucial for preventing serious injury or fatality.